To use Amazon SES as an Email Service login or create a new Amazon SES account.
If you are using IAM Users (AWS best practice) then create a user with full access for SES usage. If not remain logged in as the admin account.
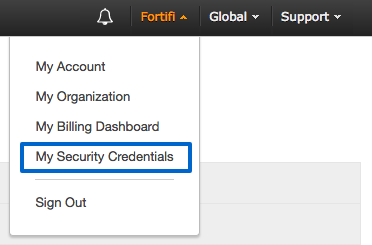
Under your account drop down click My Security Credentials:
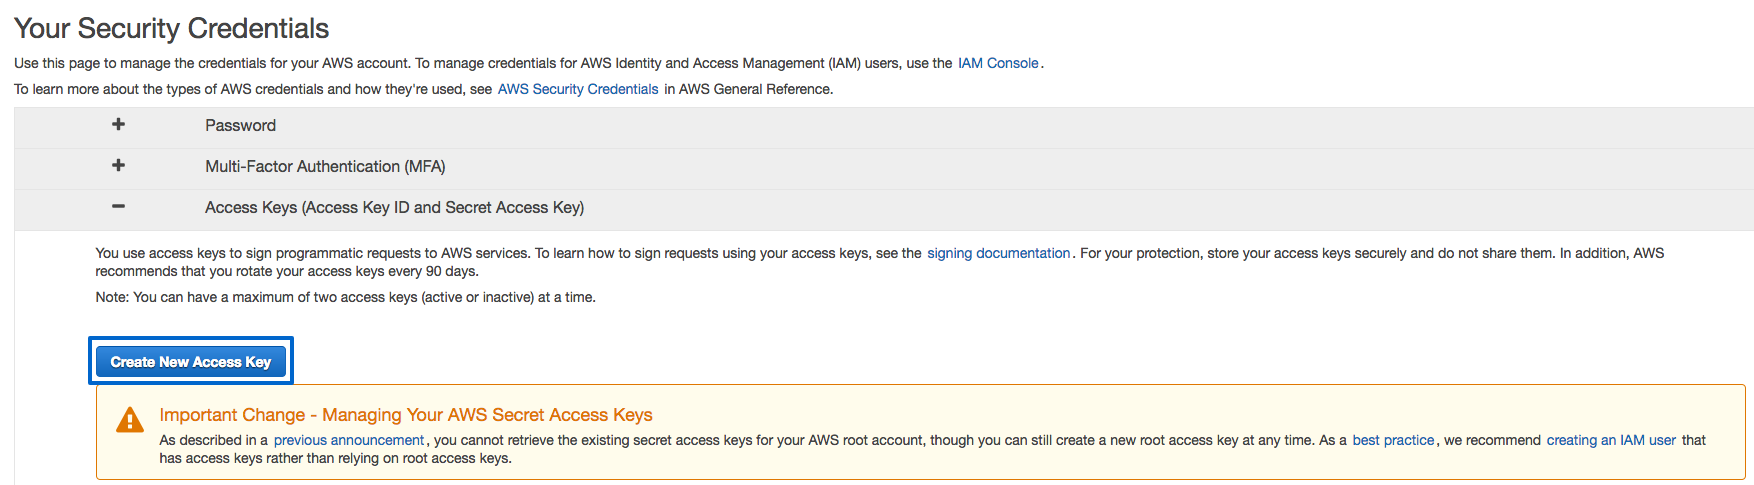
Expand Access Keys (Access Key ID and Secret Access Key) and click on Create New Access Key:
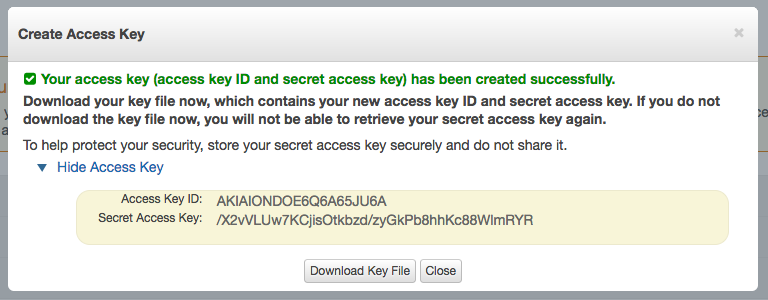
This will Create an Access Key and give you the option to Download the Key File. Instead click on Show Access Key to see these details on screen:
On a different tab log into Fortifi, open your Organisation Settings by clicking on the Organisation Menu in the top left hand corner which will display your Organisation name and selecting Organisation Settings from the menu.
Once in the Organisation Settings click on the Messenger tab and click on Services in the navigation menu on the left. This will list any existing Messenger Services and have an option to Create Service:

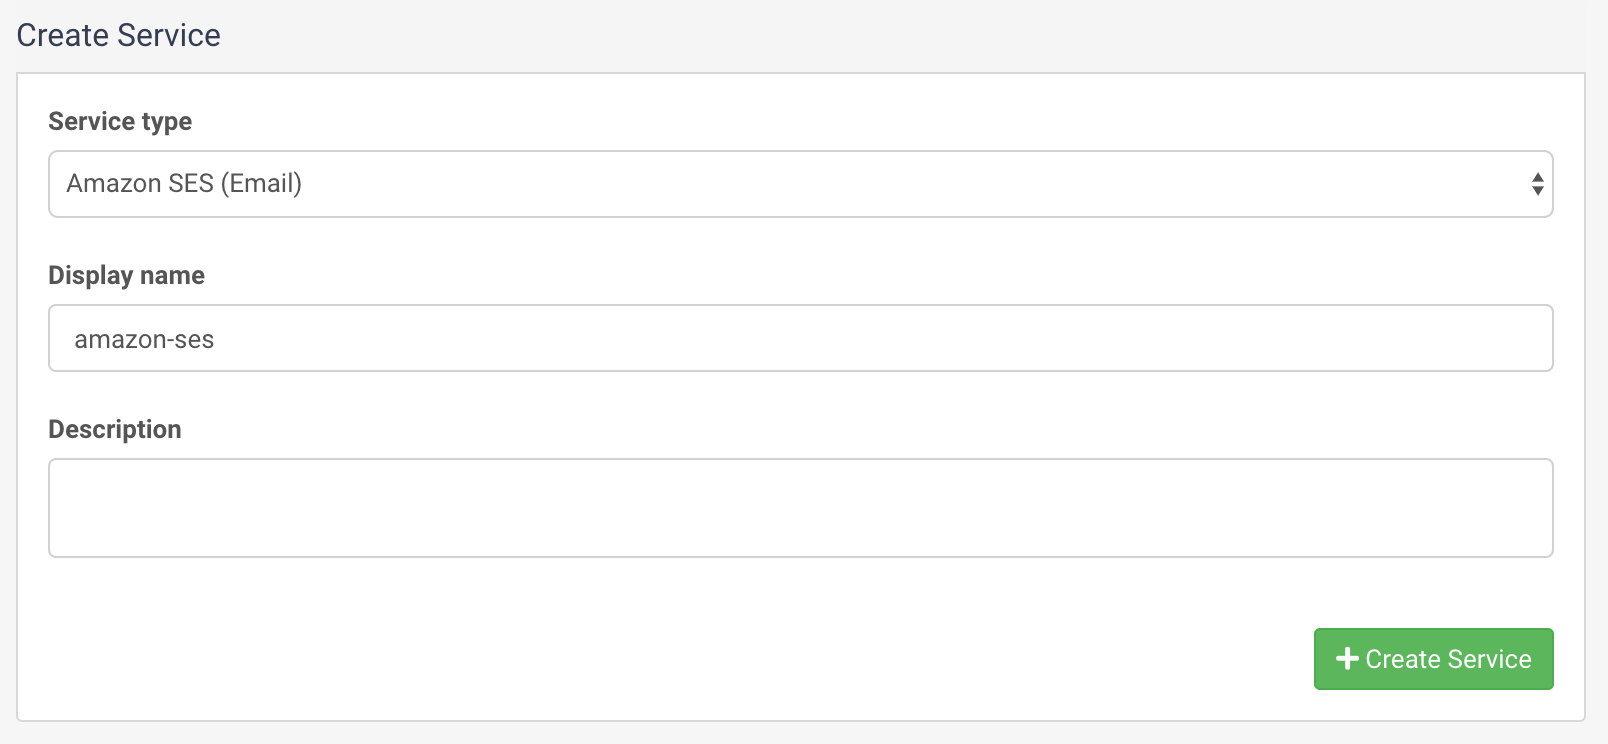
On the Create Service page you need to select Amazon SES from the Service list and give this service a name (this will default to amazon-ses). Then click Create Service:
This will create the service and prompt you to enter your API Key, API Secret, API Token and Region:
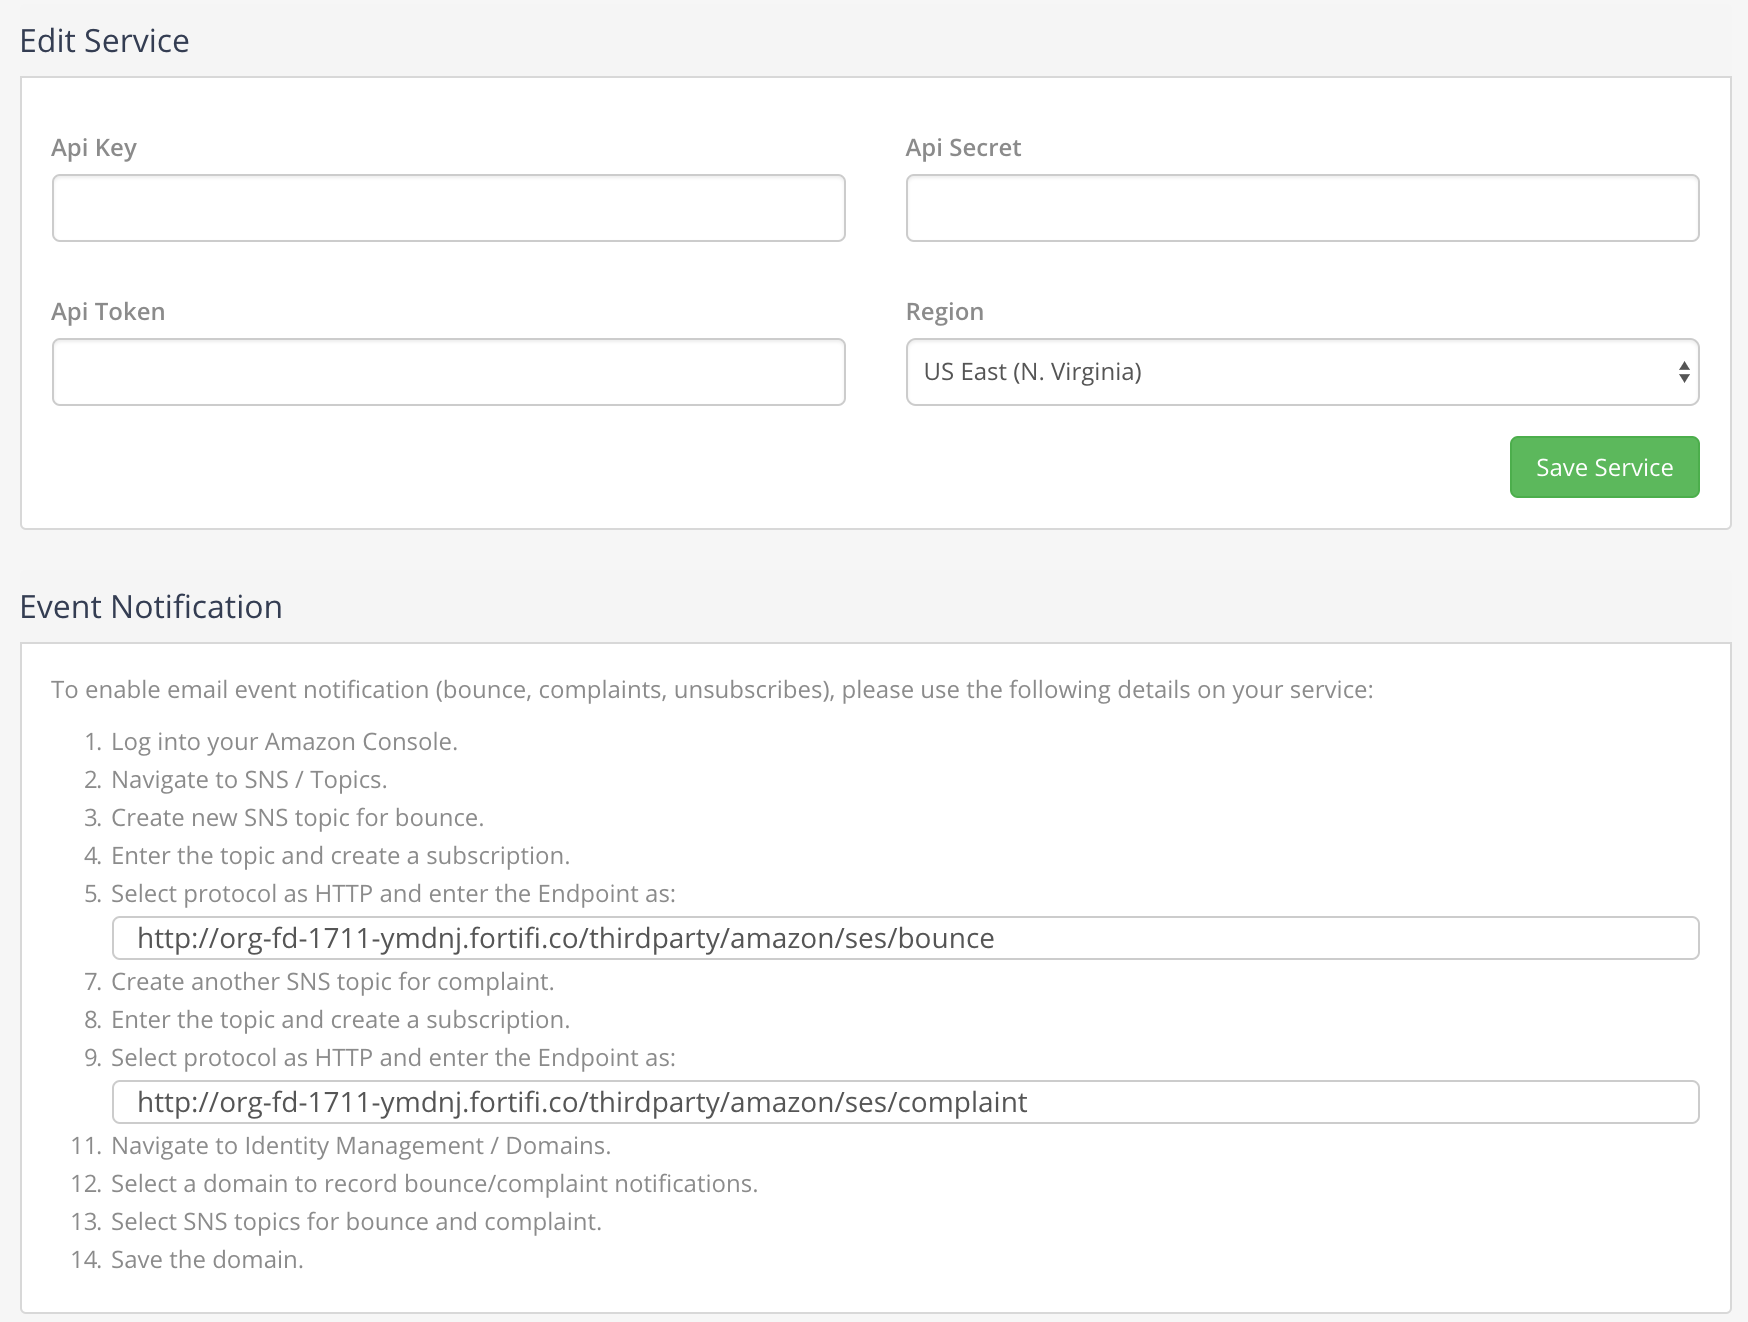
Copy the Access Key ID and Secret Access Key into the Api Key and Api Secret fields in Fortifi and ensure the Region matches the region setup in your Amazon SES account (if set).
Take note of the Event Notification text as this will provide you with the steps to enable Fortifi to track events such as Bounces, Compaints, Unsubscribes etc.
If you want reporting on this information then follow these instructions to put this URL Endoint into your Amazon SES account.
Once you are happy click on Save Service to finish setting up this Email Service. It will then appear in your list of Services and can be set to be used by the Messenger Application or the Support Application.
You can optionally set this as the default Email service by clicking the Star icon
In order to send Messages using this service you need to modify the service in the Amazon SES Console to take this out of Sandbox mode or you will recieve errors regarding the email address not being Verified
To do this log in Amazon SES browse to the Console Home.
Under Customer Engagement click on Simple Email Service.
In the menu on the left select Sending Statistics.
You will see Request Increased Sending Limits in the Additional Information links on the right of the Sending Statistcs page.
Alternatively, you can go to Support Center, choose Create Case, choose Service Limit Increase, and then select SES Sending Limits as the limit type.
Enter in the Region setup on your Amazon SES Service, the Limit Type of Desired Daily Sending Quota and then enter the new limit value:
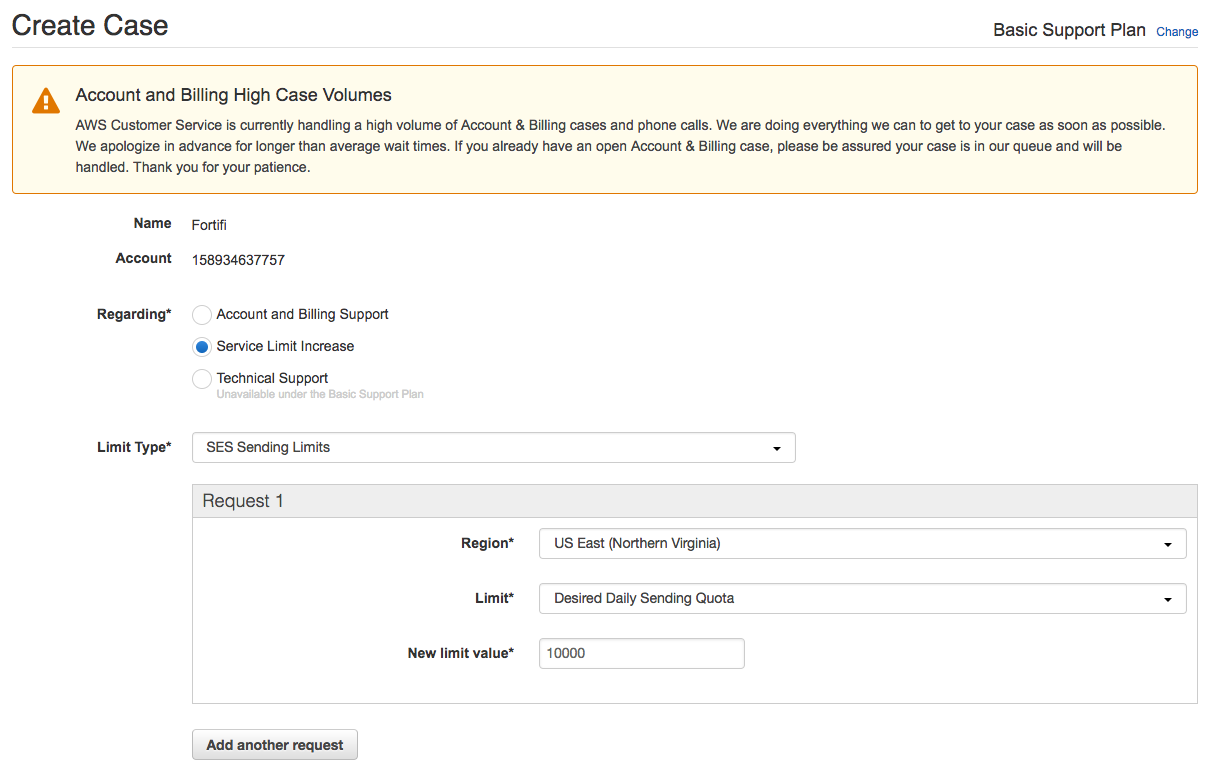
Enter in the Mail Type (Typically Transactional), your Website URL and complete the rest of this form and Submit
Amazon will then process this and once confirmed will remove your acount from Sandbox and lift the Sending Limit.