Canned Responses in Fortifi can be used in the Support Ticket or Live Chat applications to quickly add some prefilled text to your Agents replies.
This allows your agents to quickly and easily provide common answers and ensure your Support responses are uniform regardless of what Agent is replying.
You can set Canned Responses globally, so they can be used in all Support Tickets or Live Chats, or you can assign them to a Departments or Queue. These Canned Responses will only be available for use for Support Tickets or Live Chats that are in that Department or Queue. This allows you to keep the list of available Canned Responses to an efficient number for selection by your agents, rather than showing all of them at once.
To start building your Canned Responses you need to ensure you have the Canned Responses Permission.
If you have the Administrator or Support Manager role, you will have the permission already. If not you may need to adjust the roles on your user or add the Permission to a role this user already has.
Once the user has the Canned Responses permission, click on Support and the Canned Responses tab will be available:

This will display all existing Canned Responses, split by Ticket and Chat types, and if those Canned Responses are assigned to a specific Department or Queue this will be listed here as well. You can click on the eye icon against any existing Canned Response to Edit it (change the content, assign it to a different department or queue etc).
There is also a Create Canned Response button in the top right hand corner which allows you to create a new Canned Response
Once you have clicked to Create a new Canned Response you can set the Display Name (this will be used by users searching for this canned response)
A description can optionally be added as well.
You can then define the Brand, Department and Queue of this Canned Response. These are all optional, and if left at None, this Canned Response will be available for All Brands / All Departments / All Queues.
You can then set the Type for this Canned Response. This will either be Ticket if you want this canned response to be available for Support Tickets, or Chat if you want this Canned Response to be available for Live Chats.
Finally you can set the Language of the Default Template.
You can then enter the Content for this Canned Response in the Template section.
You can make use of the Quick Replacements from the drop downs to add in placeholders which will auto complete when the Canned Response is used. This is useful to pull in things like the Customer or Recipient name to make the Canned Response seem more personal.

Finally you can optionally add more Language templates to this Canned Response. Browse the Add Language drop down for the required Language Template and select it. A new Template will appear for that language allowing you to enter the text for this Canned Response in the selected language.
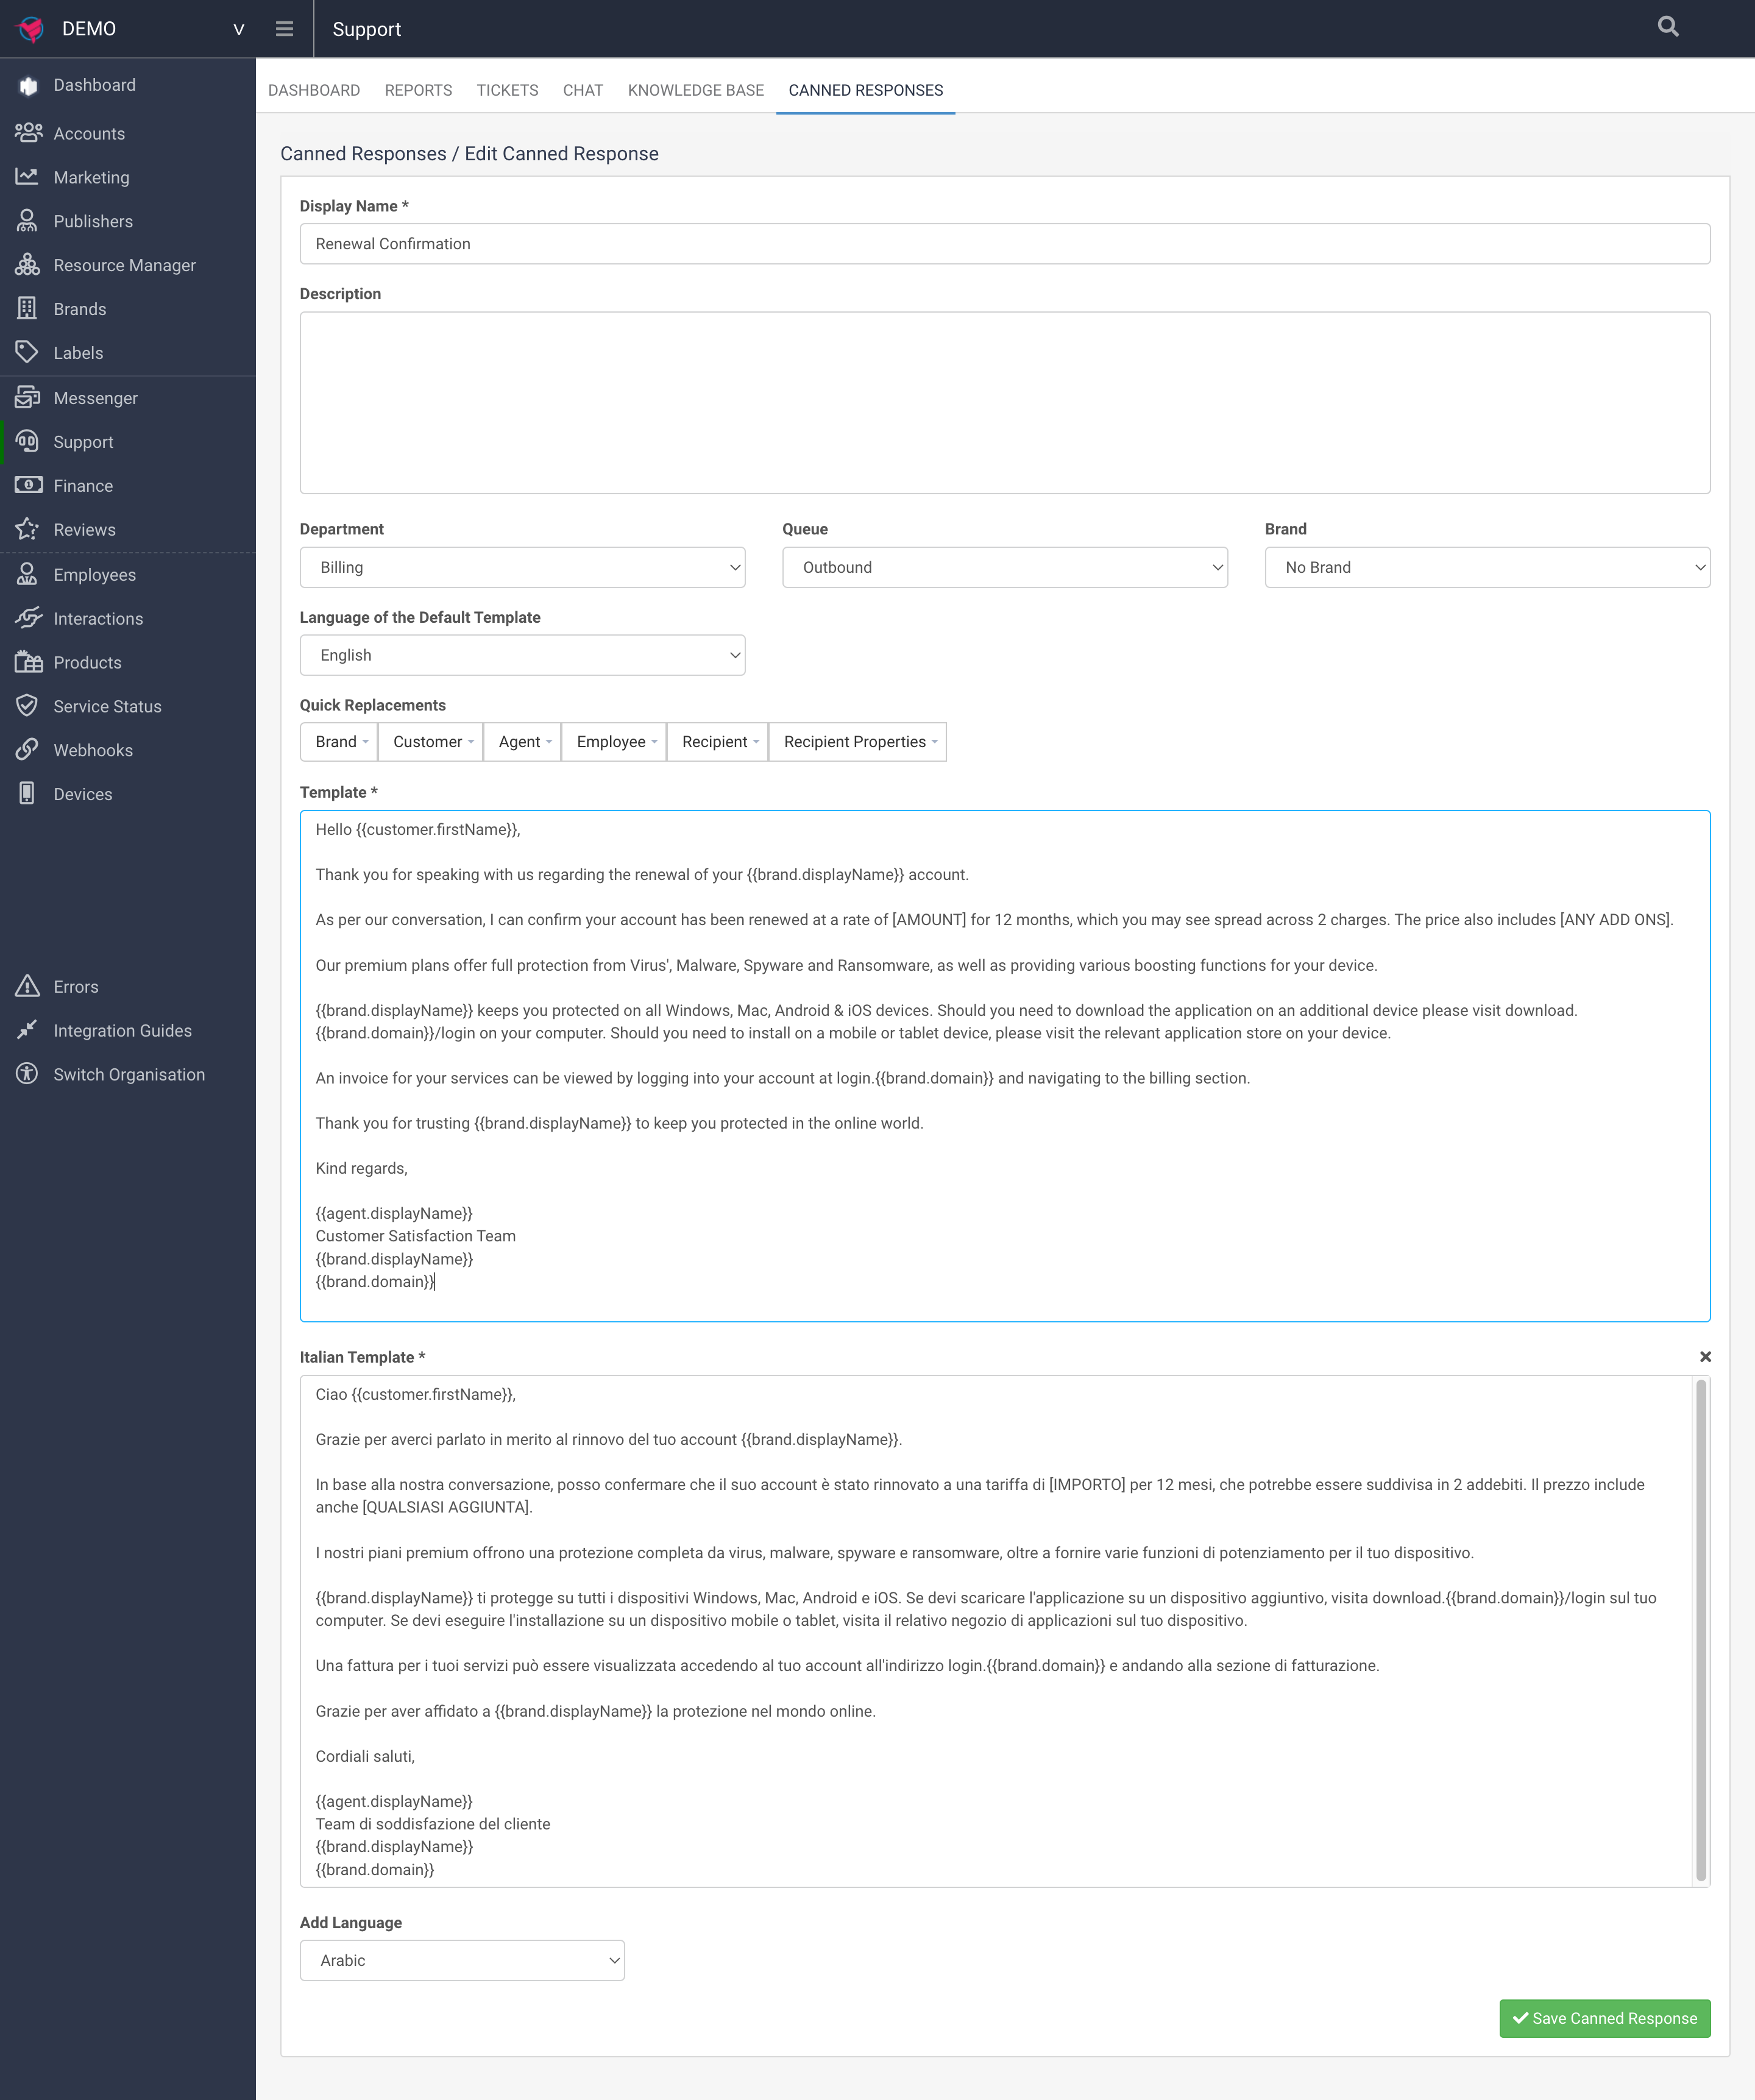
You can optionally click the Cross to remove this Language Template:

The additional Language Templates will automatically be applied based on the Language of the Support Ticket or Live Chat, so you can be confident that the exact text entered into these Language Templates will be sent to the customer.
Click on Create Canned Response and you will see this in your List of Canned responses where it can be edited or deleted. It will now be available for use in Support Tickets or Live Chats (depending on the selected Type)