Auto Responders in Fortifi are used to send Messages after events occur within Fortifi.
For instance if an event occurs such as a Customer is created or an Order is completed a Message can be sent immediately or after any delay such as an hour afterwards or a day afterwards etc.
Auto Responders can be filtered in the same way as Lists and Mailshots to segment the customer database and determine the recipients.
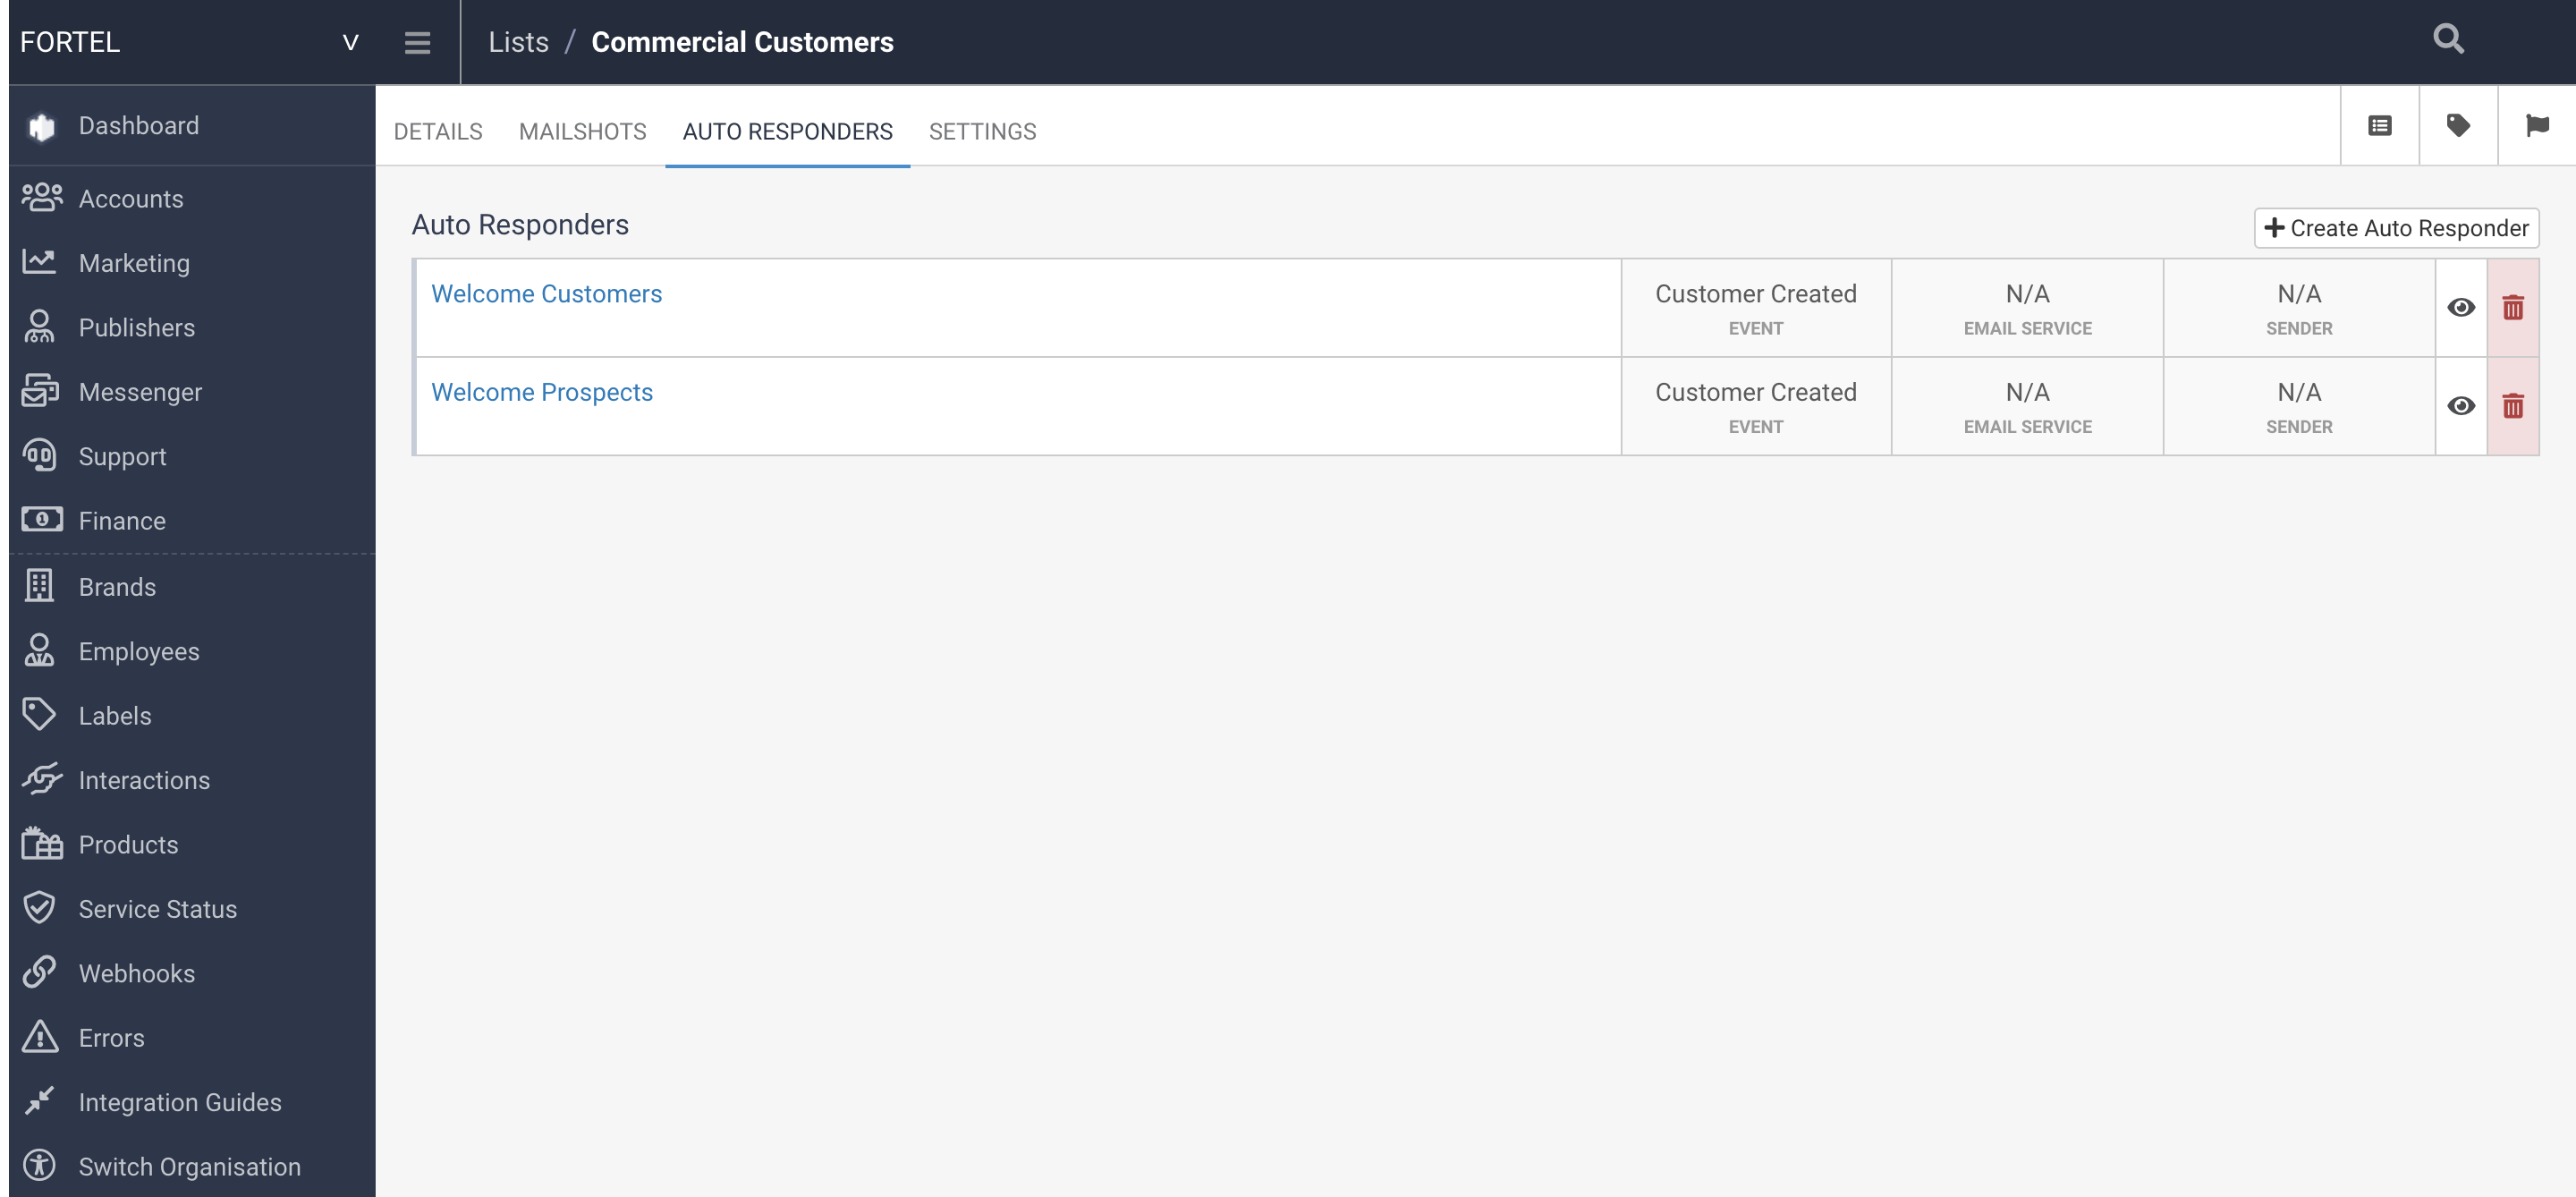
To create an Auto Responder, first select the List to determine the recipients you want to send the Auto Responder to.
Clicking into that List you can click on Auto Responders and all existing Auto Responders will be listed:
Clicking on Create Auto Responder will allow you to enter the Display Name for the Auto Responder and select the Auto Responder event you want to trigger this Message on:
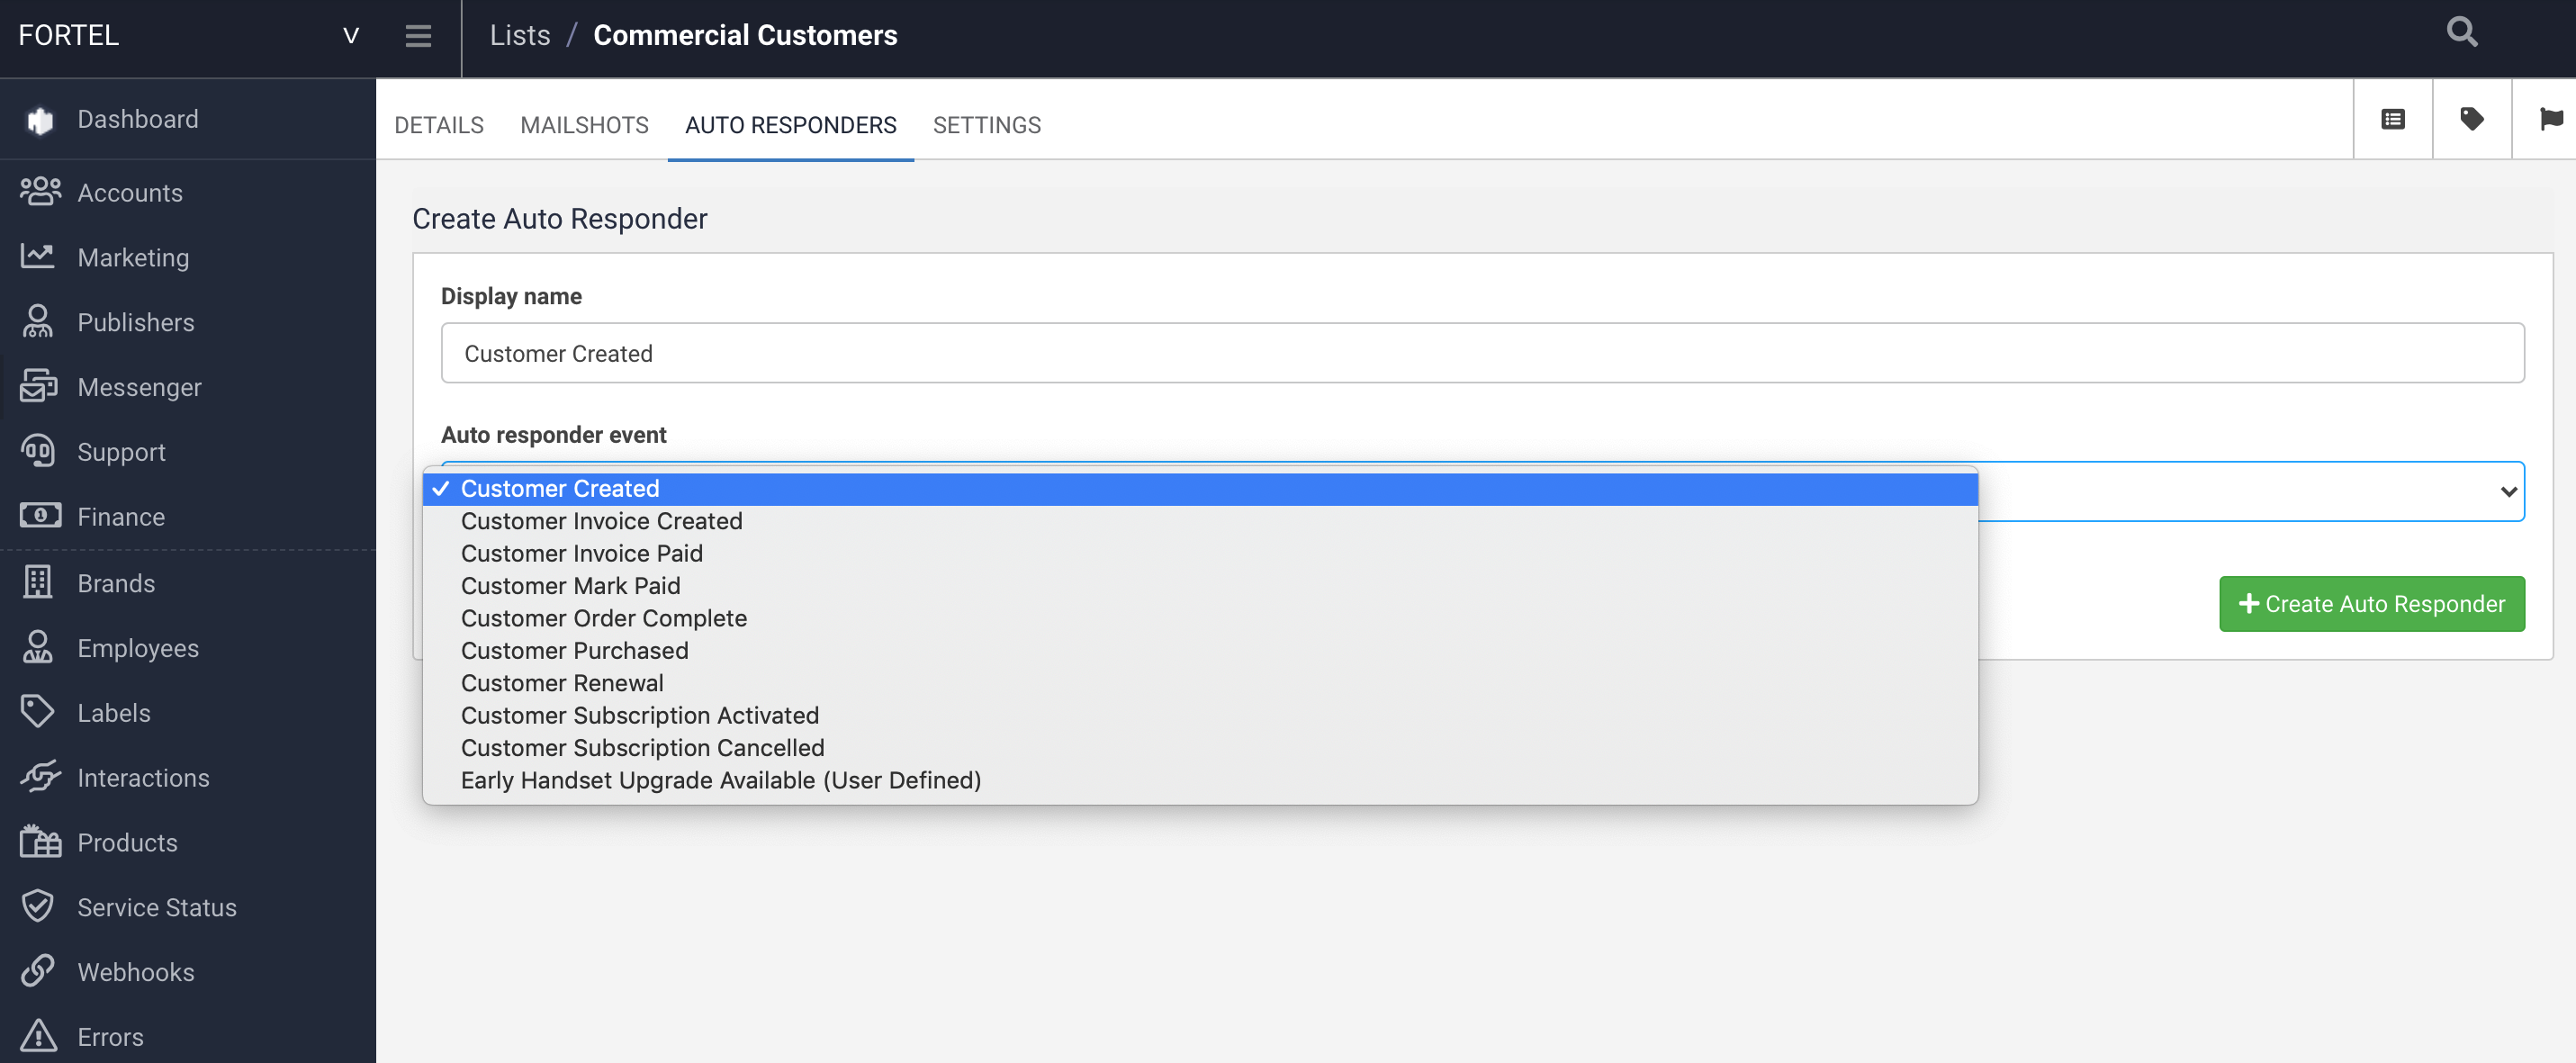
The events available to choose in the list will be dependant on the List the Auto Responder is created in. For instance Order events will only be available in Order List types etc.
With the Auto Responder created you will be shown the Details tab of this Auto Responder Campaign. You will see on this page any filters that have been inherited from the List level to segment the Customer base.
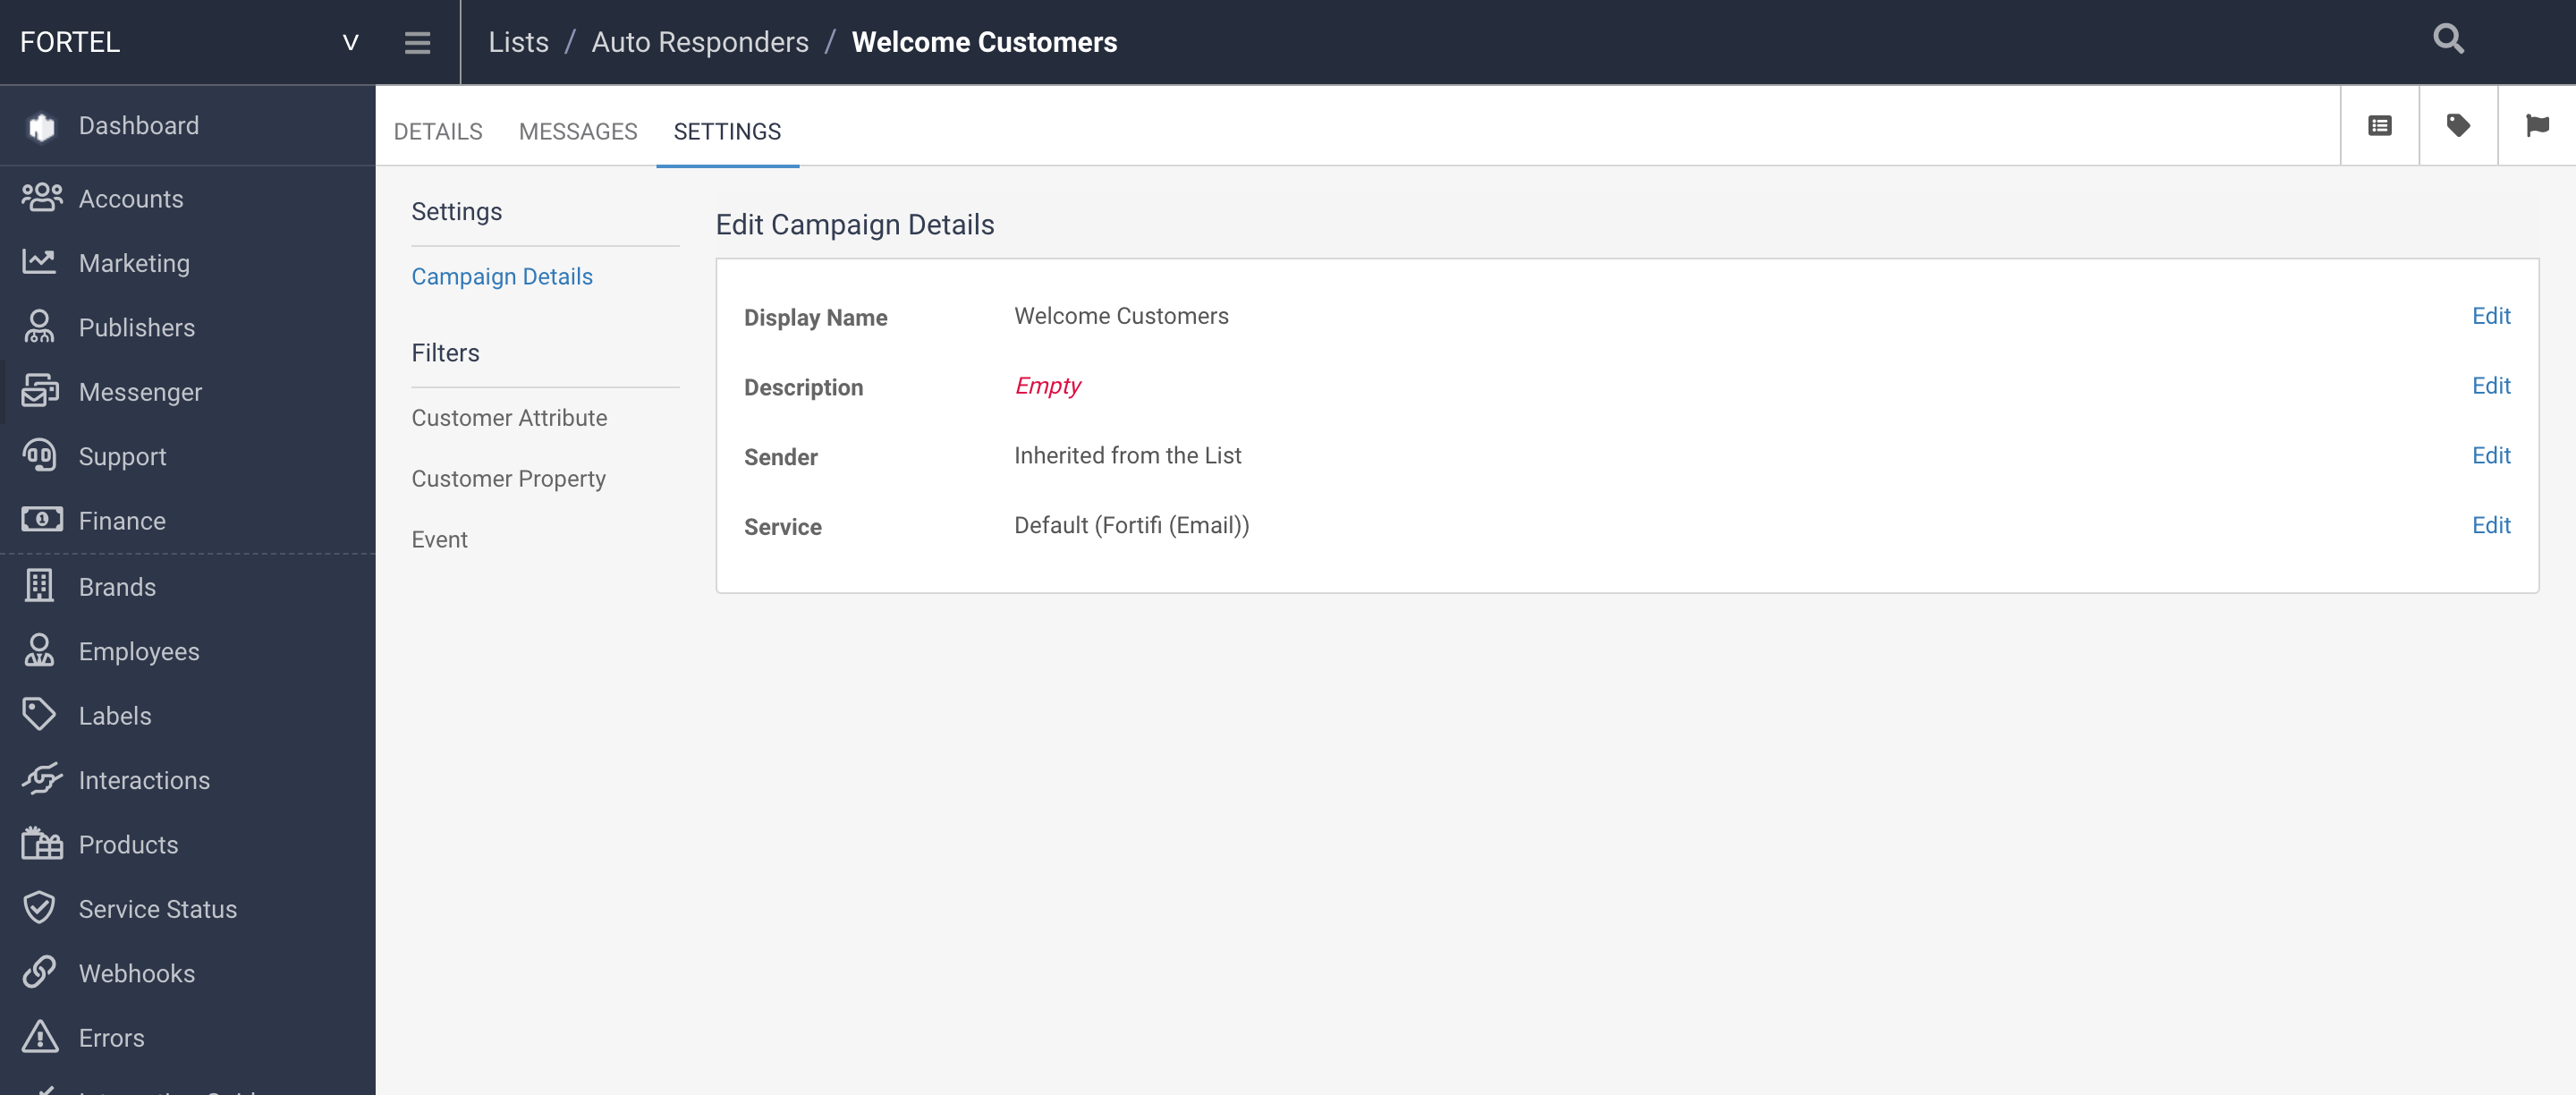
You can click on Settings at this point to change the Sender or Service for this Auto Responder - These will have inherited from the List selected, but can be overridden here if for instance you want this Auto Responder to come from a specific Sales Sender account or use a specific email service as this will be a large volume mailshot etc.
You can also Add further filters at this Auto Responder Campaign level in order to further segment your customers to just the desired Recipients of this Auto Responder.
For instance your List might be filtered to just your Paid Customers, and this Auto Responder might then be filtered to just Paid Customers who have been created from a specific landing page. You would add that additional filter at the Auto Responder Campaign level.
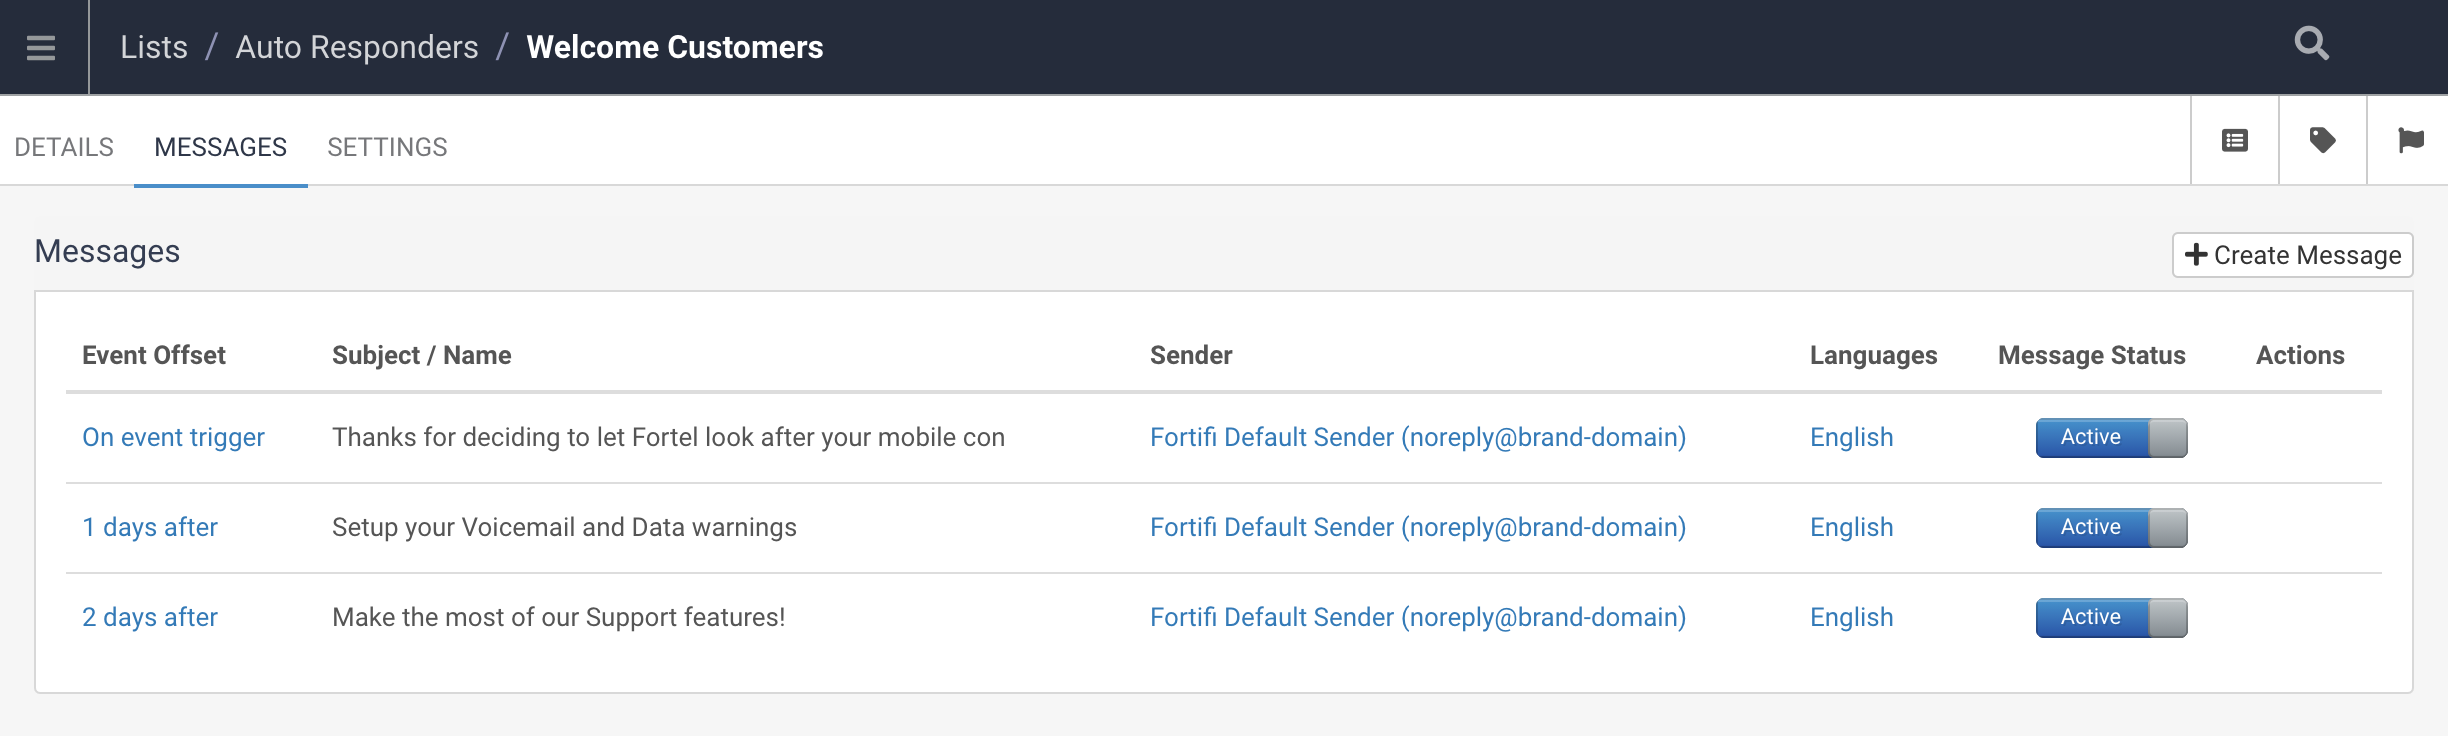
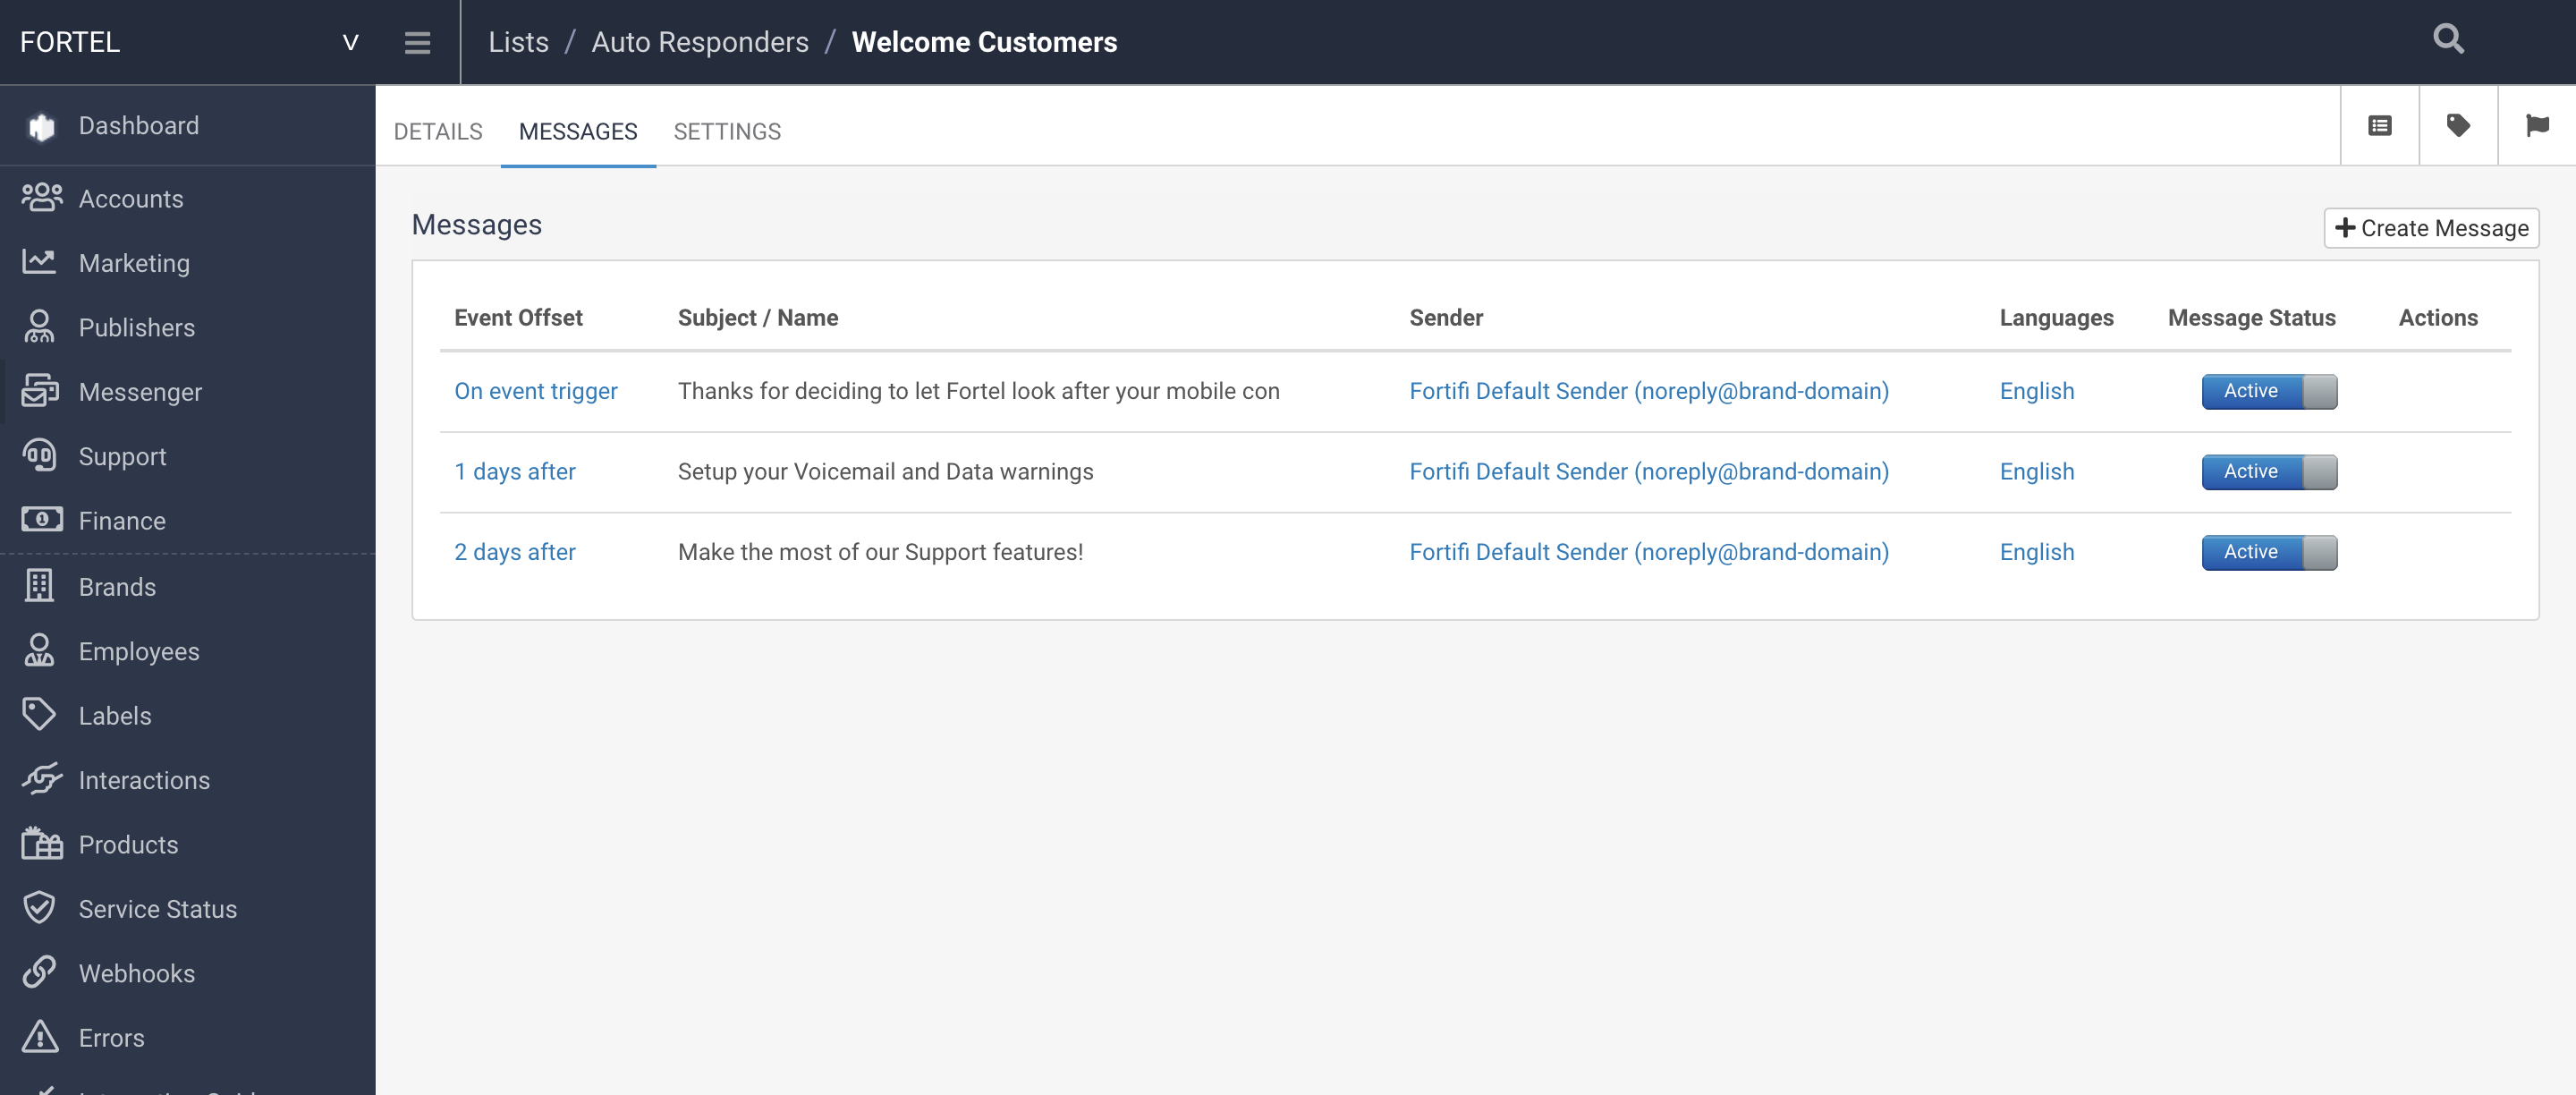
Once you are happy with the Settings and Filters, click on the Messages tab to see all exisitng Messages within this Auto Responder, and to create a new one with the Create Message button:
Click Create Message to add a new Message and enter the Subject and some content. This is an option to quickly enter the bulk of the content for the message, however you can still edit it once it has been created.
You can also define the Run Schedule of the Message. If this is left at 0 Minutes it means this will trigger as the event occurs. However you can update this to any number of minutes, hours, days or weeks after the event triggers.
By defining the Run Schedule you can set up a series of Messages all sending out for this Auto Responder Campaign at different intervals. This is a great way to automate engagement. For instance on a Customer Created Event you can have one Message triggering on Event with a welcome message for the Customer. Then you could have a message sending out a day later, giving them some tips to get started with your product or encouraging them to carry out beginner tasks etc. Then you could have a third after a week to just keep the engagement going, and so on.
This automates the entire Customer engagement journey and only needs to be setup once.
You will see when looking at the Messages tab of an Auto Responder all Messages currently setup along with their Event Offset so you can see which Messages will be sent when: