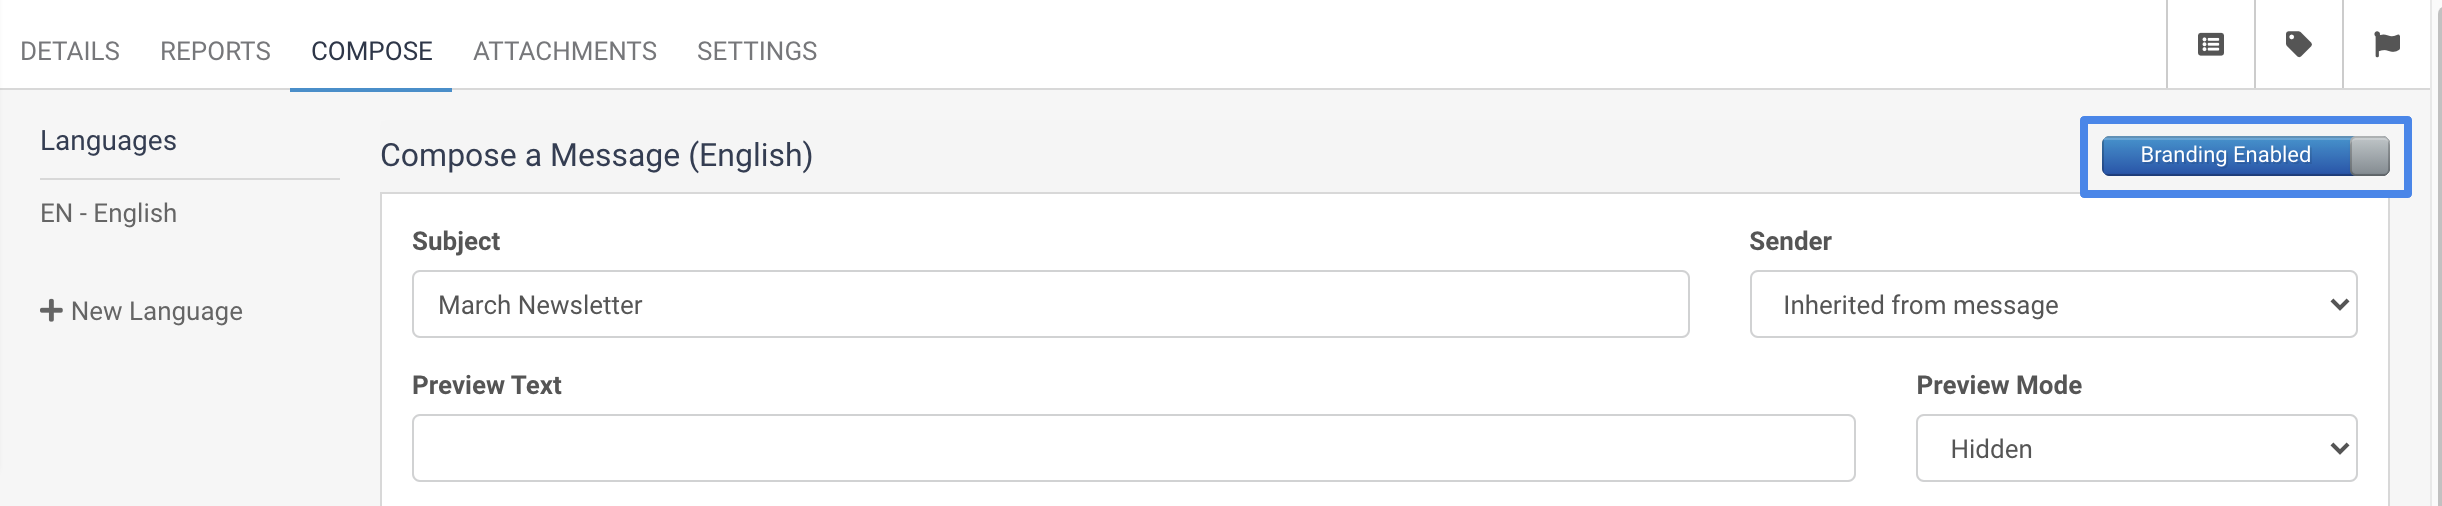
On the Compose tab in a Message the content of the Message can be entered.
There is a full text editor to allow entering the message content allowing you to format the text such as adding Bold, Italics, Bullet Points, Hyperlinks etc.

There is also an add Image button to insert an image. You enter the URL of the image you want to embed (ensure this is saved in a publicly accessible location and get the public URL for it).
You can define the Width and Height of the image and optionally lock the ratio of this, to control the size of this image within the Message.
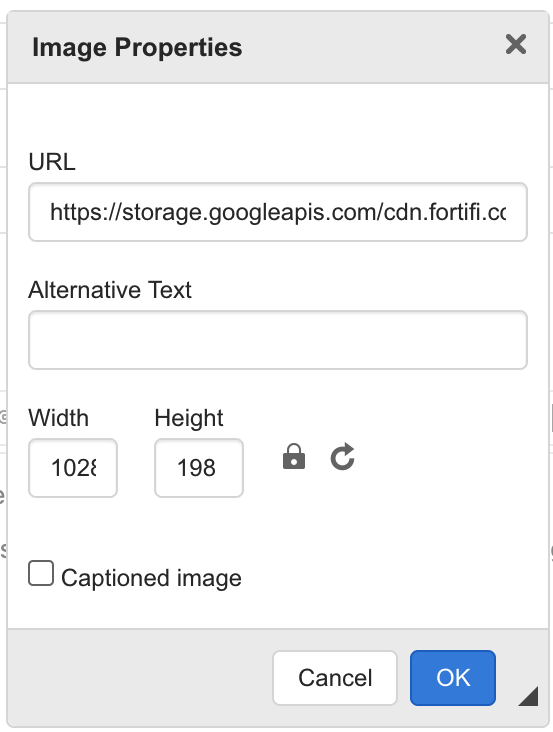
Optionally you can set the Captioned Image check box. this will put the same image into the Message, but with a banner at the bottom for you to enter a caption on the Image.
Quick Replacements are available in a drop down list and contain placeholders for things like Brand Domain, Brand Name, Sender Name, Recipient Name etc
Depending on which List Target this message is within, you may also have Quick Replacements for Subscription details, Order Details etc.
To use these, place the cursor where you want the Quick Replacement to be then browse through the Quick Replacement drop down menu and select the Quick Replacement you want to use.
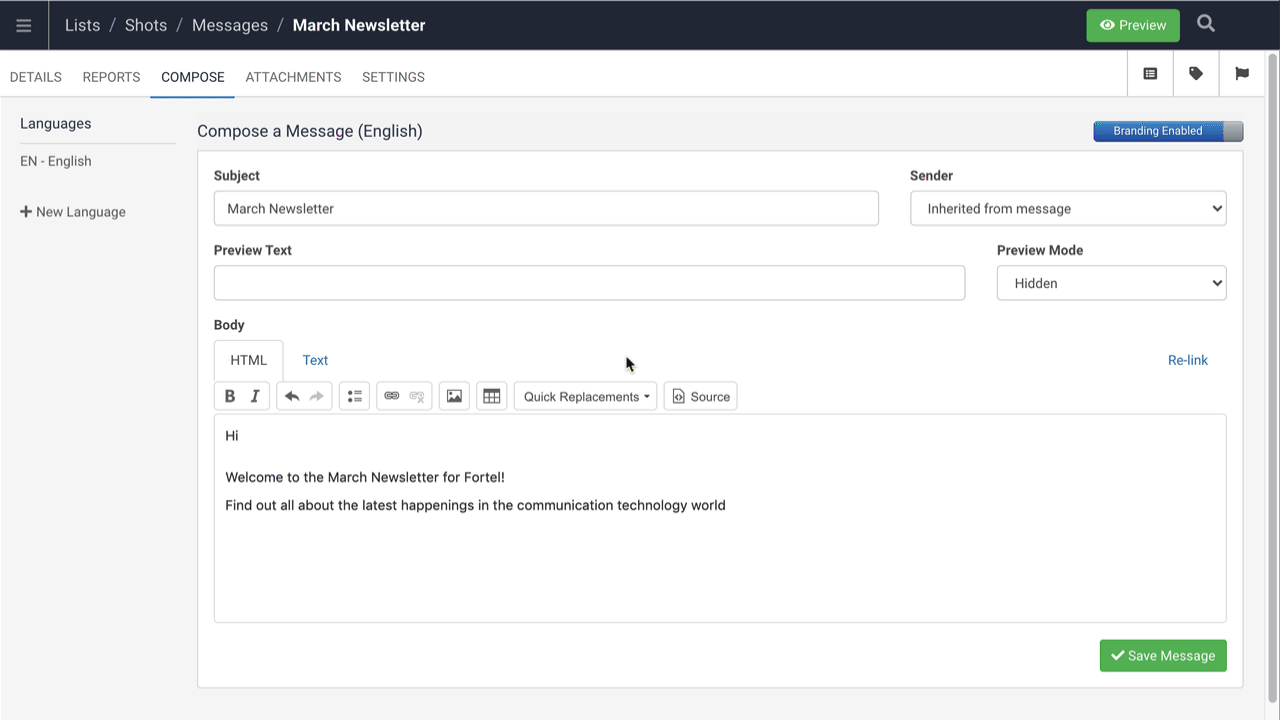
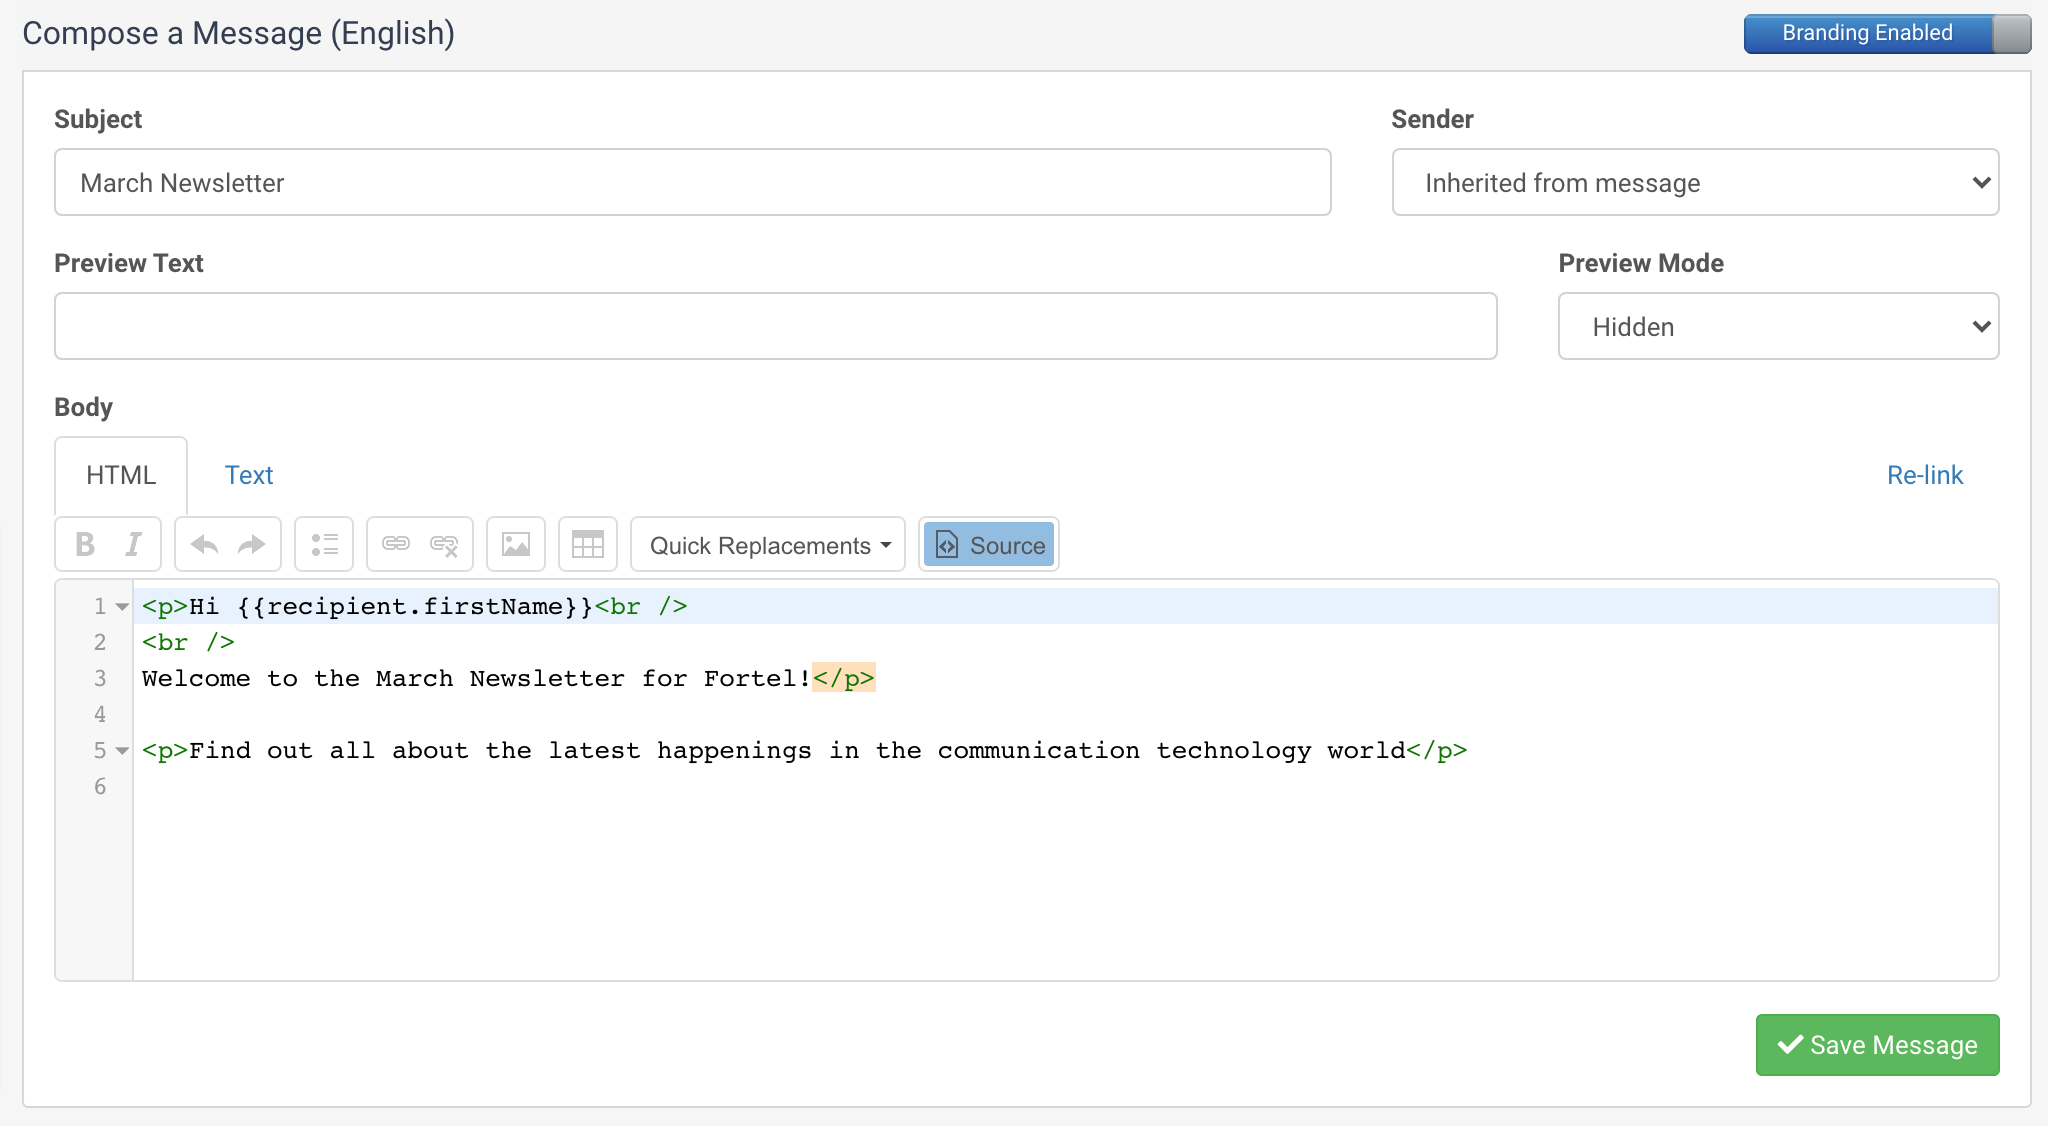
The Source button on the toolbar allows you to enter full HTML source editing for this Message allowing composing or editing of the Message using full HTML markup.
If you have designers or an external editor which outputs HTML content you can take the HTML and paste it into the Source mode of a Message to use that HTML
There are some settings on the Compose Page such as defining a Language template, the Sender for this Message and setting the Branding.
If you have created a Branding Template you can define whether this Message will use the branding template or not. Typically if you are pasting in HTML from another editor into the Source mode you would also disable Branding, as the two HTML files may conflict: